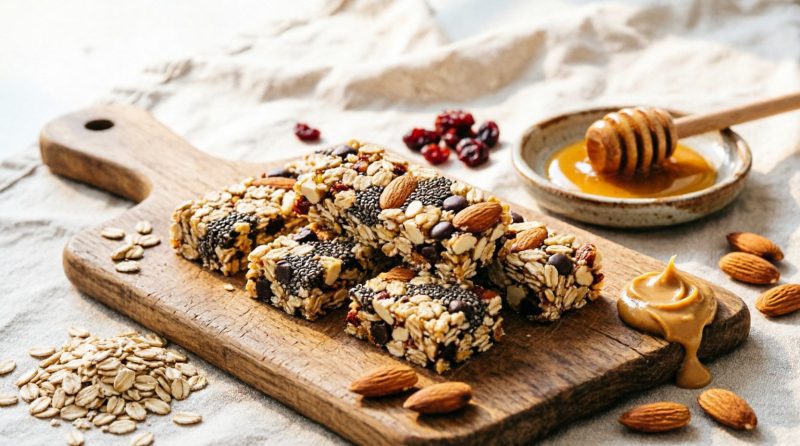
# Homemade Protein-Packed Granola Bars for Snacks & Breakfast
Let’s be honest: mornings are rarely graceful. You’re half-asleep, hunting for your keys, trying to remember if you packed lunches, and somehow you’re expected to eat a balanced breakfast before 8 AM? And then there’s that 3 PM wall… you know the one. That’s when your brain starts bargaining with the pantry. Usually, you end up with a store-bought granola bar that tastes like sweetened sawdust, costs a small fortune, and leaves you hungry again forty minutes later.
What if your snack actually kept you full? What if it tasted like a treat instead of a compromise? And what if it took less time to make than waiting in the drive-thru line?
Enter your new kitchen MVP: **homemade protein-packed granola bars**.
I used to be a loyal granola bar buyer until I flipped one over and read an ingredient list longer than a pharmacy receipt. Since switching to homemade, I’ve saved money, ditched the weird preservatives, and actually started looking forward to my snacks. Plus, you get to play flavor scientist. Want peanut butter chocolate? Done. Prefer something bright and fruity? Easy. It’s your bar, your rules.
—
## Why Homemade Actually Matters
Store-bought bars aren’t evil, but they’re often engineered for shelf life, not satisfaction. They’re loaded with added sugars, mystery syrups, and just enough protein to sound impressive on the label. When you make them at home, you control exactly what goes in. Real oats. Real nut butter. Real honey or maple syrup. And enough protein to actually keep your energy steady instead of spiking and crashing.
The best part? You don’t need a degree in culinary school or a fancy food processor. Just a mixing bowl, a spoon, and about 15 minutes of hands-on time.
—
## The Simple Formula (Plus the Recipe)
These bars are built on a flexible template. You’ve got your **base** (oats + sticky binder), your **protein punch** (powder, nuts, or seeds), and your **“yes please” mix-ins**. Tweak the ratios to your taste, swap ingredients based on what’s in your pantry, and make them yours.
### 📝 Ingredients
– 2 cups old-fashioned rolled oats (certified gluten-free if needed)
– 1 cup creamy nut or seed butter (peanut, almond, or sunflower seed butter)
– ⅔ cup honey or pure maple syrup
– ½ cup protein powder (whey, casein, or plant-based)
– ½ cup chopped nuts or seeds (pecans, walnuts, pumpkin seeds, etc.)
– ⅓ cup mini chocolate chips, dried fruit, or coconut flakes
– Pinch of sea salt
### 👩 How to Make Them
1. **Prep your pan.** Line an 8×8 baking dish with parchment paper, leaving a little overhang on the sides. This makes lifting and slicing infinitely easier.
2. **Warm the binders.** In a microwave-safe bowl or small saucepan, gently heat the nut butter and honey (or maple syrup) until smooth and pourable. About 30–45 seconds in the microwave usually does it.
3. **Mix in the protein.** Stir the protein powder and salt into the warm mixture until completely smooth. No lumps allowed!
4. **Fold in the rest.** Add the oats, nuts/seeds, and your favorite mix-ins. Stir until everything is evenly coated. *Troubleshooting tip:* If it looks dry, add a tablespoon more syrup or nut butter. If it’s too wet, toss in a handful of extra oats.
5. **Press it down.** Transfer the mixture to your prepared pan and press firmly. I like to use the bottom of a flat measuring cup to really pack it tight. (This step is non-negotiable if you want bars that actually hold together!)
6. **Chill & slice.** Refrigerate for at least 2 hours, or until completely firm. Lift out using the parchment overhang, slice into 12 bars, and wrap individually if you like.
—
## Make Them Your Own
One of my favorite things about this recipe is how easily it bends to your cravings or dietary needs:
– **Vegan?** Swap honey for maple syrup and use a plant-based protein powder.
– **Nut-free?** Sunflower seed butter works beautifully and won’t compromise texture.
– **Lower sugar?** Use unsweetened applesauce or a sugar-free syrup alternative, though the bars will be slightly softer.
– **Flavor combos I’m obsessed with:**
– *Brownie Batter:* Add 2 tbsp cocoa powder + dark chocolate chips
– *Trail Mix:* Almonds, raisins, and a sprinkle of cinnamon
– *Lemon Blueberry:* Lemon zest + freeze-dried blueberries
– *Salty Caramel Pretzel:* Chopped pretzels + a drizzle of caramel-flavored protein powder
—
## Storage & Grab-and-Go Tips
These bars are meal-prep friendly in the best way. Store them in an airtight container in the fridge for up to two weeks, or freeze them for up to three months. I usually wrap each bar in a small square of parchment and toss them in a reusable bag. They thaw quickly, hold up in lunchboxes, and survive the bottom of a gym bag without turning into crumbs.
If you’re packing them for kids or on-the-go mornings, slice them a little thinner. They’re dense enough that you won’t miss the extra bulk, and they fit neatly into snack containers.
—
## A Little Note on “Healthy” Snacking
I’ll be real with you: these bars aren’t magic. They’re just real food, thoughtfully put together. They won’t fix a stressful schedule or replace a good night’s sleep, but they will give you something nourishing to reach for when life gets loud. And there’s something quietly satisfying about pulling a homemade snack out of your bag while everyone else is unwrapping something that came in industrial packaging.
Give them a try this week. Tweak the flavors. Burn the first batch if you have to (it happens to the best of us). Then let me know which combo wins you over. I’m already eyeing a chocolate-sea-salt version for my next round… consider this your warning.
Happy snacking.
*P.S. If your bars come out a little crumbly, don’t panic. They still taste amazing crumbled over yogurt or blended into a morning smoothie. Kitchen wins come in all shapes.*